

With this nifty little clip you can turn any receiving blanket into a nursing cover.Sad thing about this post is that I planned on making this before my daughter was born 5 months ago, and I am just now getting to making it, better late than never! Even though I just made it yesterday, I already love this thing because now shes at the age where she wants to just pull the blanket down. Now I can use all these receiving blankets I never use anymore.
This is my first tutorial, and even though it is really simple, I'm excited about it. I hope that it makes sense, leave me a comment and tell me what you think. Here Goes!
Grab all your supplies beforehand:

Ribbon - I used 7/8"
2 Mitten Clips - If using thicker ribbon you might need suspender clips
1 Vest Buckle - Or any other size appropriate slider hardware
Heat N Bond Ultrahold Tape
Scissors
Tape Measure or ruler
Lighter
Cutting mat is not needed, I jus thought it would make the photos look nicer
Ready, Set, GO!
Cut 20 inch piece of your ribbon and burn ends to seal and prevent fraying

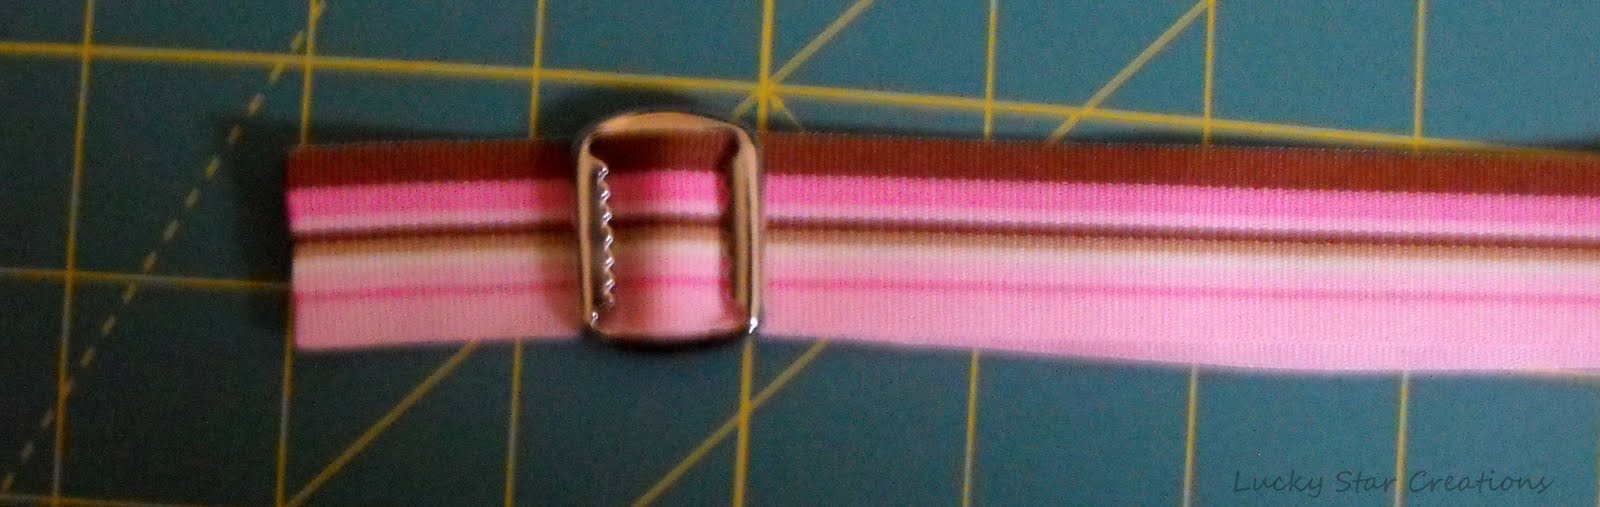
Insert ribbon into buckle and fold over the center bar about an inch down, add a square of the Heat N Bond tape to fasten together.

Lay flat (wrong side up) and slide other ribbon end through clip. Make sure the top of your clip is facing up.

Take ribbon end down through buckle opening (from the wrong side) and back through to the other side.

String ribbon down through second clip (with clip facing up, I say this because I kept forgetting, lessons learned the hard way are so much fun...NOT)

Add another square of Heat N Bond to attach and your done! Now you can attatch it so any recieving blanket you have to use as a nursing cover.

So there it is. My first how-to. Pictures will get better, Lighting is horrable. I hope it made sence, leave a comment if I didnt, and i'll clear anything up, but it's pretty stright foward.
6 comments:
I'm sorry but that wasn't a very good tutorial, I got so confused and just figured the belt buckle out myself. Thanks anyway
Great tutorial. This was so easy. I also use mine when we are out to eat to attach toys so they don't end up on the dirty floor.
Thanks for the tutorial, it makes sense if you are doing it at the same time as reading it! Hoping to use this soon (due in a couple weeks)
This couldn't have been easier. The first anonymous commentator needs to work on his/her reading comprehension skills. Thank you for this great tutorial - I made two for a friend and plan on making more for preggo friends in the future!
Thanks for the tutorial!
Thanks for the tutorial. Can't wait to make one for my daughter! And yes, it makes perfect sense when you read it while making it.
Post a Comment