Showing posts with label baby. Show all posts

Tuesday, February 7, 2012

Baby's 1st Birthday Party

This weekend we celebrated Nana's first birthday. Boy does time fly! It seems just like yesterday I was bringing this teeny little creature home from the hospital. Now she's into everything chasing around her big brother.

I had originally pinned tons of fun little ideas with a pink cupcake theme, but reality set in and we did something very simple but I think it turned out really beautiful and I was so happy with the results.

This banner was done with simple paper plates and letters cut out of card stock. So simple yet pretty. (I did not notice that this was crooked until looking at this picture, maybe no one else did either).
The tissue paper pom poms were made using a Martha Stewart tutorial found here. I strung them to the ceiling with yarn from my stash and command hooks. I had everything on hand so I thought it would save on balloons.
 Close up of pom pom


Cupcake tower was from Michael's (wrapped in pink tulle), amazingly cute with pink polka dot cupcake wrappers. That was her little party hat I made to go with the rest of her outfit. If you look in the back at her highchair that matches too. It originally was a brown and teal, which nice, was an eyesore with the decor, so  safety pinned some extra fabric to the front and it matched.
Look at her! Tutu was made by me using the satin wrap tutorial found here. On this page she also has a few links on how to make the tutu itself. I Made her onesie applique using some fabric and Heat N Bond ultra hold. Cupcake clip art is from here. The number one and flame was using a regular font and a shape in Microsoft word. Here are some close up shots


Hat was made using a cereal box and a template found here. I added an inch to the bottom to make it a little taller, covered in fabric, added ribbon trim to hide seam, hot glued a tulle pom pom to the top. After I hot glued it to the headband, I also hot glued a felt circle to secure it on.
 Here she is with the hat on her head. It was a rare picture. She liked it, but only for short periods at a time.
In the end, it was a great day and I think she had fun. She was wore out by the time everyone left and slept good that night.


Linked up at Made By You Monday

Tip Junkie handmade projects


Wednesday, December 28, 2011

Craft Clay Ornaments

Keeping with my "what everybody got for Christmas" series of posts, this next one was also for my husband but from the kids. We made craft clay ornaments and I had the little one paint them for his daddy. I even painted one myself with baby girl's hand print, as a baby's first christmas kind of thing. Sorry I don't have any pictures of him working with the dough cutting out the ornaments. We were having so much fun I totally forgot to take pictures.


Normally I like to use salt dough, but I wanted to try something different and actually make something that I have pinned on pinterest. So I used this Easy Craft Clay recipe I had found. You use baking soda and corn starch (that's where your box of  baking soda went honey haha) and cook it on the stove, which was really cool to watch. It also comes out a bright white color which was nice.

Noah LOVED playing  with the dough, he rolled it and smashed it, after we cut out all the ornaments we needed (using a glass, and a straw for the hole) he played with the left over dough for a few hours, it took forever to get him to stop.

One thing I did not like was that the bigger ones we made cracked. You were supposed to let this air dry, which takes a few days, and over those days the craking starts. I would have much rather used a salt dough next time and baked it so that it came out right. But who knows, it could have been something I had done wrong. If you try it let me know how it turns out.


It took a while to get nana's handprint right, the internet makes it seem easy, but it's not, she did not like it. I even tried her foot, which i realized was too big to actually hang. When I first painted it, it didn't look christmas enough, so I added glitter with Mod Podge. I recommend if you do, add Mod Podge to top to seal it in. I just added the words with a fine tip sharpie.


He also had fun painting them, I was a little nervous about letting him use my acrylic paints because I never painted with him before but he was very good and we both had a blast. I tried to coax him into using more christmas colors,  but then I figured he was having fun let him do what he wants. But next time I think I may draw designs on a few for him to work on painting in the lines.

Monday, November 28, 2011

Thinking About Christmas

I hope everyone had a wonderful holiday weekend. I know I did, it's so nice to spend time with family! Now that thanksgiving has passed us by everybody is thinking about Christmas. I absolutely love Christmas so I have been thinking about it for a while now. We have even had our tree up for a week already, haha.

I have a few upcoming projects in mind to start on, but the sad part is I cannot post them until after Christmas since they are gifts (don't want to spoil the surprise). That being said, I love giving handmade gifts, they are so much more personal and heartfelt. What kind of handmade gifts will you guys be giving this year?

Sometime the smaller kiddo's don't appreciate the handmade gifts as much and rather have a new toy with extremely hard to open plastic packaging. That's ok though, I picked out the perfect gifts for them this year. For the boy we are getting the Leapster Explorer by Leapfrog with the camera attachment, because he loves to take pictures like his daddy.

I've done a lot of research on this toy and have read lots of reviews and I absolutely LOVE it. I know he will have tons of fun playing games and I will know he is learning. You can even track your child's learning progress by hooking it up to your computer. There are a ton of games for this toy but my favorite part is that you can download games, videos, and interactive books directly to your handheld... NO LOST GAMES! If he does get an actual game cartridge we will probably go with the Mr. Pencil game as it seems like one he would really like. Oh, and I forgot to add my other favorite part. The difficulty of these games change as your child learns, how could you not love that, you know its not going to be a game he completes in a day and is done with it.

For baby girl we picked out the cutest little doll perfect for her age. The Baby Stella doll by Manhattan Toy. This doll comes in a few different styles but we choose the one with the black hair, isn't she just the cutest?
There has been TONS of good reviews for this doll as the perfect "first doll" for little girls, and I am a big advocate of every little girl having a dolly. Stella is a nice cuddly soft doll which I love. I think soft dolls have so much more character than the plastic face/bodied dolls. She even comes with a little magnetic binky to give her
You can get lots of clothes and accessories for her which I love, every girl (even a dolly) needs lots of accessories. Looking around the Internet I did not find a lot of free (or even paid) patterns for diy clothes for this doll...except one for a diaper pattern from Treasures For Tots. I know when she gets it I will try to work on lots of clothes and accessories patterns to post as there is a lack of them on the net already. [so excited!] One day I hope to get her a Waldorf doll like the ones here, but for now, this one is perfect.

 That's it for now, tomorrow I will share with you whats on my Christmas list.


Disclaimer: I was not paid or compensated by anyone to write about these products. I just really liked them and wanted to share my opinion.


Saturday, August 20, 2011

I Was Featured!

On Totally Tutorials today! I was so excited when I was going through my news feed on google reader I almost cried.They featured my nursing cover clip post.

If your not familiar with the site, they take really cool tutes from all over he blogosphere and feature them for everybody to see. Have a tute of your own? You can submit it just like I did and be featured too. Link there on my sidebar or click here


Totally Tutorials Blog

Tuesday, June 28, 2011

Tutorial: Adjustable Nursing Cover Clip


With this nifty little clip you can turn any receiving blanket into a nursing cover.Sad thing about this post is that I planned on making this before my daughter was born 5 months ago, and I am just now getting to making it, better late than never! Even though I just made it yesterday, I already love this thing because now shes at the age where she wants to just pull the blanket down. Now I can use all these receiving blankets I never use anymore.
This is my first tutorial, and even though it is really simple, I'm excited about it. I hope that it makes sense, leave me a comment and tell me what you think. Here Goes!

Grab all your supplies beforehand:
Ribbon - I used 7/8"
2 Mitten Clips - If using thicker ribbon you might need suspender clips
1 Vest Buckle - Or any other size appropriate slider hardware
Heat N Bond Ultrahold Tape
Scissors
Tape Measure or ruler
Lighter
Cutting mat is not needed, I jus thought it would make the photos look nicer

Ready, Set, GO!

Cut 20 inch piece of your ribbon and burn ends to seal and prevent fraying


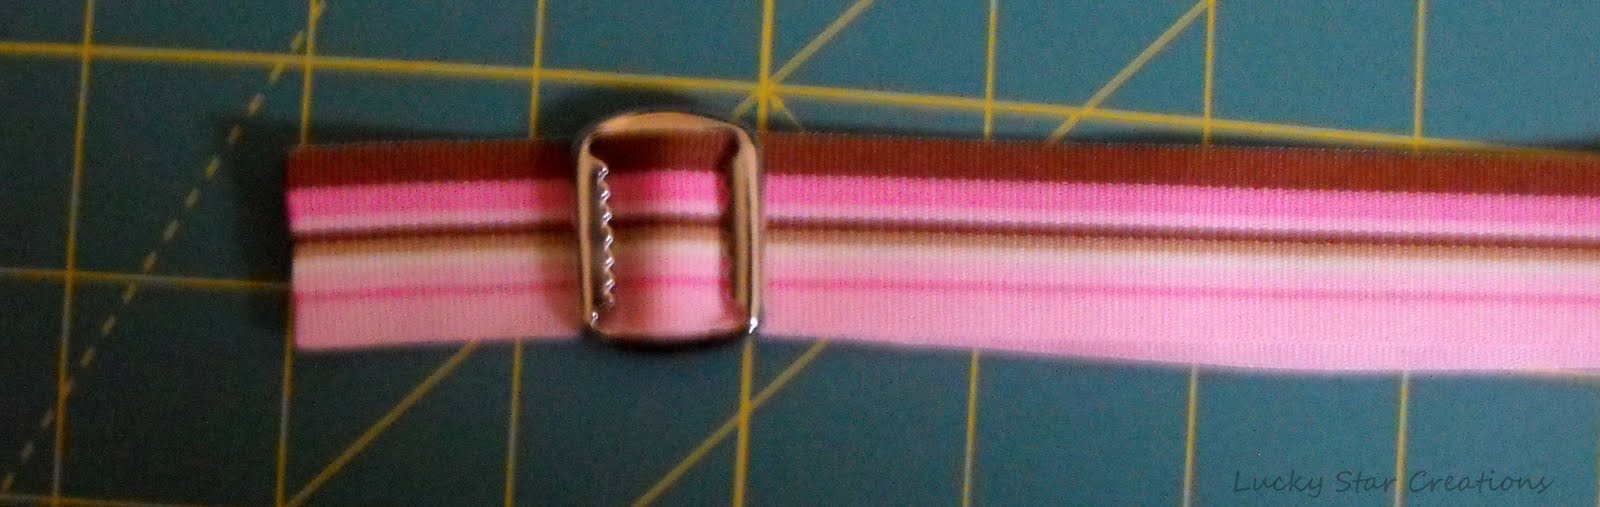
Insert ribbon into buckle and fold over the center bar about an inch down, add a square of the Heat N Bond tape to fasten together.


Lay flat (wrong side up) and slide other ribbon end through clip. Make sure the top of your clip is facing up.


Take ribbon end down through buckle opening (from the wrong side) and back through to the other side.


String ribbon down through second clip (with clip facing up, I say this because I kept forgetting, lessons learned the hard way are so much fun...NOT)


Add another square of Heat N Bond to attach and your done! Now you can attatch it so any recieving blanket you have to use as a nursing cover.


So there it is. My first how-to. Pictures will get better, Lighting is horrable. I hope it made sence, leave a comment if I didnt, and i'll clear anything up, but it's pretty stright foward. 


Tuesday, May 3, 2011

Cutie Pie Flower Headband


 Another project from Generation T. I love this book! Since I previously made something for my little guy, I thought it was only fair that my next project be something for my little princess. Project number 29 called “Flur-de-tee” is now one of my favorite things. It’s the most simple little flower applique ever. Cut a circle, hand sew around the edge, pull together, and sew in place. I used a 2 and 3 inch circle and layered them together. For the headband I used a scrap from yesterday’s project that was already the perfect size for her little head, sewed it together and attached the flower to the sewn edge to hide the seam. This all took under 10 minutes total, would have probably been less, but cutting perfectly is a little tricky with a little toddler in the room who wants to check out all the new stuff.


Oh, and I hate to state the obvious, but doesn’t she just look so precious sleeping totally unaware of her of her new accessory I put on her while she was asleep. hehe

Sunday, April 17, 2011

Baby Mobile Photo Roundup Take II

Last time I did a roundup of handmade baby mobiles so I thought that I would do another one featuring designer styles. I am still in the planning step of my future design with a basic idea but no clue what to hang from it. I’m not even sure what theme I’m going for but I will probably end up doing something with stars like I always do. Anyway, here is some more wonderful inspiration.


Wednesday, April 6, 2011

Baby Mobile Photo Roundup

This morning the hubs was playing with baby girl and mentioned that she needed a mobile to entertain her, so me being the person that I am saw that as an opportunity for a project. Only having an idea for the basic structure and no idea what theme to have hanging I thought I would look online for a little crafty inspiration


1. Big Fairies Felted Mobile
2. Needle Felted Mobile
3. Hanging Tree Limb with Baby Bird
4. Modern Baby Mobile with Birds and Owls
5. Bird Parade
6. Love Chirp Flutter Nursery Mobile
7. Country Bumpkin Baby Mobile
8. Baby Mobile Nursery Decoration Red and White
9. Sweet Pink Shimmer Butterfly Baby Mobile
10. Clouds and Stars Origami Mobile
11. Hanging Flowers Hand Wired Paper Mobile
12. Bird Chandelier Girl and Baby Mobile
13. Five Little Birds Sleeping at Night