Thursday, July 21, 2011

6 Things I Love

Amy over at Mod Podge Rocks did a post like this and I liked it so much I wanted to steal borrow the idea too. Check out her 5 here. I did six because I couldn't narrow it down to just five.

[Photo]

1. Strawberry Banana smoothies from McDonald's. My love of this flavor of smoothie started a long time ago from the frozen yogurt place in our local mall. Once Mickey D's got these, which was a lot easier to get then driving 30mins to the mall, I fell in love with them all over again. In my opinion, greatest things ever!


[Photo]

2. Let's Make a Deal. This comes on CBS at 10am (eastern). I absolutely love this show, I watch it everyday and I'm dying to be on it. Yesterday I finally thought of what costume I wanted to wear: A cute cow costume, it will consist of a cow print dress and a headband with cow ears, and a cowbell necklace. When I get the money to go to California and go, I will definitely post on my diy costume.


[photo]

3. Google Reader. Since I am new to the blogosphere, I love following all of the crafty blogs that brought me the inspiration to blog myself, and the new ones I find everyday. I love reading my blogs through google reader so I can have all my favorites in one place and I never miss a good post. To see all the blogs I love, just check out the list on my sidebar.


4. Ravelry. I have been a member of this website for a long time and never really used it. Lately I've been wanting to crochet since I'm limited space for now. I love all of the free patterns I can find here, they have a little bit of everything. Lately I've been working on a doll for Naomi. I'm using different elements from different patterns to get it right, I'll show you guys when its done.


5. My Tervis tumbler. I got the  24oz Cherry Blossom one from Bed Bath & Beyond. Mine has a light pink top because I switched it from another cup. I use this for everything, hot or cold it keeps its temp for a long time. Since its microwaveable I can make my tea right in it. The fact that it's a clear insulated mug made me had to have it, although I thought it was a little expensive at first, with a 20% off coupon it was worth the extra few bucks. I'm going to go back to get the handle that goes to it soon.


6. Ben & Jerry's Banana Split pint. Eating ice cream straight out of the pint to be is pure bliss. If you have not tried this flavor before, you got to. I used to be addicted to their Strawberry Banana FroYo, sadly they discontinued it, and tried this one as a request by one of the customer service reps and love it. I eat ice cream with a baby/toddler spoon. I don't know why, but it makes it better. My spoon + a pint = my guilty pleasure

I know this will change soon and that my "it" things will switch up, don't worry, I'll keep you posted if it does.

What are you into? leave a comment telling me your 5 favorite things of the moment.

Wednesday, July 20, 2011

Make Your Own Buttons


I saw this post over on over on Craft Gossip and I thought it was amazing. Sometimes I have a vision of a project in my head and get frustrated when I can't find exactly what I'm looking for. In fact I was having this problem yesterday when working on a design for a duvet, I wanted cute buttons for it and couldn't find exactly what I wanted online. ( I know right, you can find everything online) I thought of making polymer clay buttons, but that was no good because they break. These custom buttons made from shrink paper over on S.P.W. (Scissors. Paper. Wok.) are amazing! Get the tute and make your own! I know I will.

Photo from [S.P.W.]

Tuesday, July 19, 2011

TuneUp your iTunes

Let me start off by saying that this is really not a craft related post, but it was something that made me happy and I had to share.

I've seen the commercials on TV for TuneUp for a while but I never remembered what it was when I got to the computer to try it out. If you don't know what it is, its an application that works with your iTunes or Windows Media Player and cleans up all your blank information such as track titles, album and artist names, album art, etc.
Anyone who knows me knows that I am very anal about my iTunes being organized. I Put some CDs on there for some friends when I didn't have Internet and some were mixed CDs and not having titles to songs an album art was bugging me. I had no way of doing this myself because I didn't know the songs so this thing was a god send.
After I downloaded the program and started it, it also loaded my iTunes, I selected the songs without actual names and dragged them to the box, and a few minutes later it had all the info that was missing and all I had to do was save. It also had a separate feature to find missing album art which I liked because it could find the ones that iTunes could not. It does have a thing to find duplicate songs, but I didn't need that.
Now that my iTunes is back in harmony again, all I need now is something to automatically add the lyrics to the song so I have them on my iPod if I need them., now that would be AMAZING!

a new iPod wouldn't hurt either :)

Monday, July 11, 2011

Moo Cow Marshmallow Pops


I LOVE cows. They are my all time favorite animal, eventually I want a pet cow and name her Latte. yeah, its that serious. When I was doing my morning blog reading I came across this adoriable little guy via Craft Gossip. It orginally comes from Cute Food for Kids, and it totally makes me want go buy some marshmallows and make a whole herd of them :) Find out how to make them here.

Tuesday, June 28, 2011

Tutorial: Adjustable Nursing Cover Clip


With this nifty little clip you can turn any receiving blanket into a nursing cover.Sad thing about this post is that I planned on making this before my daughter was born 5 months ago, and I am just now getting to making it, better late than never! Even though I just made it yesterday, I already love this thing because now shes at the age where she wants to just pull the blanket down. Now I can use all these receiving blankets I never use anymore.
This is my first tutorial, and even though it is really simple, I'm excited about it. I hope that it makes sense, leave me a comment and tell me what you think. Here Goes!

Grab all your supplies beforehand:
Ribbon - I used 7/8"
2 Mitten Clips - If using thicker ribbon you might need suspender clips
1 Vest Buckle - Or any other size appropriate slider hardware
Heat N Bond Ultrahold Tape
Scissors
Tape Measure or ruler
Lighter
Cutting mat is not needed, I jus thought it would make the photos look nicer

Ready, Set, GO!

Cut 20 inch piece of your ribbon and burn ends to seal and prevent fraying


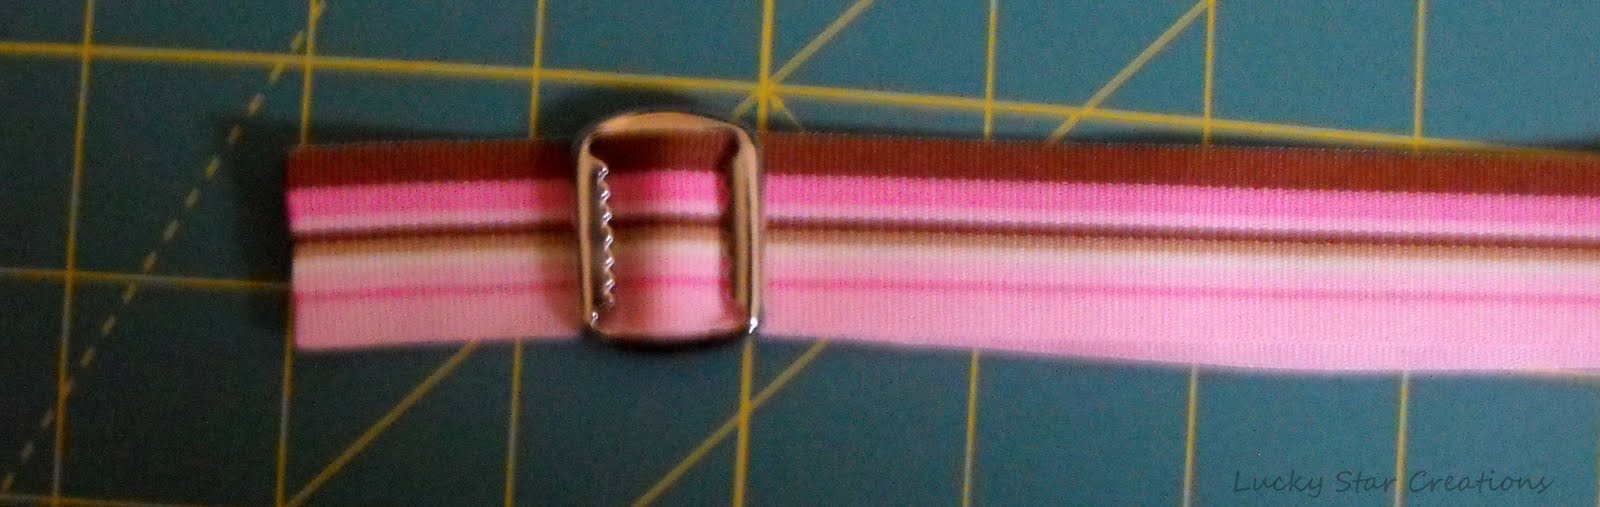
Insert ribbon into buckle and fold over the center bar about an inch down, add a square of the Heat N Bond tape to fasten together.


Lay flat (wrong side up) and slide other ribbon end through clip. Make sure the top of your clip is facing up.


Take ribbon end down through buckle opening (from the wrong side) and back through to the other side.


String ribbon down through second clip (with clip facing up, I say this because I kept forgetting, lessons learned the hard way are so much fun...NOT)


Add another square of Heat N Bond to attach and your done! Now you can attatch it so any recieving blanket you have to use as a nursing cover.


So there it is. My first how-to. Pictures will get better, Lighting is horrable. I hope it made sence, leave a comment if I didnt, and i'll clear anything up, but it's pretty stright foward. 


Monday, June 27, 2011

Sew Everything Workshop Book Review

[Photo from Workman publishing]

A few weeks ago we took a family trip to the library. Originally it was to use the internet since ours was out but since I was there I thought I would look for a book on sewing, since I have a machine and only really know the basics of sewing straight lines. Our library didn’t have a wide selection of craft books published in this decade but I did find a book called Sew Everything Workshop by Diana Rupp. Let me start off by saying I love this book. I really need to buy my own copy so that I can stop renewing this one.
Like all my other books this book has a very fun to read, down to earth tone to it. I like craft books that I can sit and read like a novel, not just like a boring step by step instructional. It starts off with an introduction of the author of the book Diana Rupp. She owns a craft school in New York called Make Workshop, where I definitely have to go and check out sometime soon. It also gives you tips and pointers on setting up your sewing area and supplying your sewing box with all the necessities and fun luxuries.
One of my favorite parts is that it explains exactly how a sewing machine works, and the difference between machines and how to pick one that is right for your needs. Not only does it have everything you need to know to get started sewing but an overview of different types of fabrics and notions, and how to use them.
At the end of this book it has 25 patterns to get you started sewing. It has a little bit of everything, a jacket, dresses, stuff for your home, for your guy (boxers, and a tie), even something for your pet, or baby. Out of the 25 patterns 10 have actual paper patterns to follow. Don’t know how to use a paper pattern? That’s ok, in the chapters beforehand it gives you very detailed instructions on how to do so.
I followed the instructions on how to make a sewing machine cover. It said to use oil cloth, but I just used an old curtain I had on hand and it came out great. I plan to jazz it up later with some decorations, maybe something to make it a little sturdier.
Excuse the photo; I’m not in my normal element so I had to work with what I had.

Here is the detail of the stitching at the bottom. It was my first use of a decorative stitch!


The last chapter of the book is titled “hand sewing 101” which gives you a little insight on the basics. A short resources guide lists all the different places handy for a new sewer to know. It even lists a few good blogs, and we all know how much I love a good crafty blog.
Oh, and yes I do realize all the books I have reviewed come from Workman Publishing, that wasn’t on purpose, I realized that after I finished reading this one, but hey, they know a good thing.

Thursday, June 23, 2011

Happy National Pink Day!


Today is National Pink Day!

Go Celebrate.

Eat a strawberry cupcake with pink sprinkles, blow up some pink balloons, wear a pink outfit, drink some pink lemonade, paint your toes a glittery pink, whatever you do, enjoy the day!

Tuesday, June 21, 2011

Jewelry Box Makeover


I found this cute jewelry box for a dollar at a yard sale. Seeing as all my jewelry is currently kept in a crayon box, I had to have it. The only bad thing was that the top fabric was hideous; well I guess you could say it was a good thing because now it looks fabulous! 
Before

After


TaDaa! What a difference. This project was originally supposed to be a tutorial but things didn’t go as planned. I got so excited to have a project because I haven’t had one in so long, I dove right in unprepared and when I tried to remove the mirror it broke in three pieces. Using what I had on hand, a box cutter and a butter knife, I should have expected it. For a while I was mad because buying a new mirror would defeat my purpose of a cheap project so to be on the positive side I just scraped it and made it work.  The rest of the project went well, sanding, painting, and a little bit of glossy Mod Podge, and a hot pink zebra fat quarter for a dollar at Wal-Mart. That’s all it took, it was a real easy project, which is good because I haven’t figured out how to balance a project, a now 3 year old, and a 4 month old.

Saturday, June 4, 2011

Wine Bottle Cozy for Grads

Recently my cousin graduated from college and although it wasn’t to her, it was a big deal to me so I wanted to give her something nice, and hand made. Looking into my trusty little book, Generation T, I made this little number called “stocked up” which is project number 32 in the book. Since the outer shirt I used was a summer tube top that was pretty thin, and I figured a glass bottle needs a little more support, I made an inside layer with a yellow polo, which also added a little more color. Add a bottle of Wild Vines blackberry merlot, and Voila! A great, handmade gift fit for any occasion. Then after looking at it for a day, I thought it looked too plain to give just like that so I made a “Congrats” tag out of a two toned index card and letter punches, added some curling ribbon, and then it was complete.

Tuesday, May 3, 2011

Cutie Pie Flower Headband


 Another project from Generation T. I love this book! Since I previously made something for my little guy, I thought it was only fair that my next project be something for my little princess. Project number 29 called “Flur-de-tee” is now one of my favorite things. It’s the most simple little flower applique ever. Cut a circle, hand sew around the edge, pull together, and sew in place. I used a 2 and 3 inch circle and layered them together. For the headband I used a scrap from yesterday’s project that was already the perfect size for her little head, sewed it together and attached the flower to the sewn edge to hide the seam. This all took under 10 minutes total, would have probably been less, but cutting perfectly is a little tricky with a little toddler in the room who wants to check out all the new stuff.


Oh, and I hate to state the obvious, but doesn’t she just look so precious sleeping totally unaware of her of her new accessory I put on her while she was asleep. hehe